
LED Pumpkin
Animated LED Pumpkin
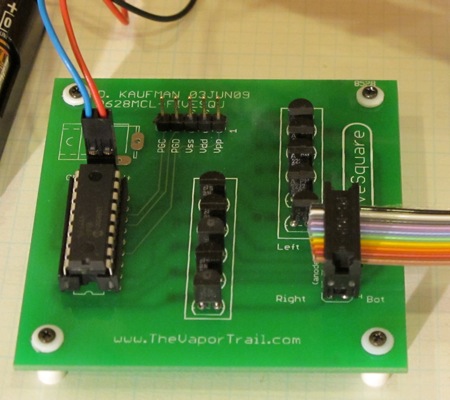
For Halloween I thought it would be great to take one of those pumpkins you always find at the hobby store, like Michaels, and put some LEDs in it. I wanted to do more than just have them all on. I wanted them to blink in interesting patterns. I realized I could use the board I created for the FiveSquare project, which uses a PIC16F648. With this I would be able to control and animate 25 LEDs. I also realized I could add a new layout to the Animator application that matched the arrangement of LEDs on the pumpkin and be able to easily create different animations.
Leave comments on the blog post
Downloads are available at the bottom of the page.
The Animator download can be found on the Animator page.
The FiveSquare PCB download can be found on the FiveSquare page.
Larger photos available on Flickr
LED Layout
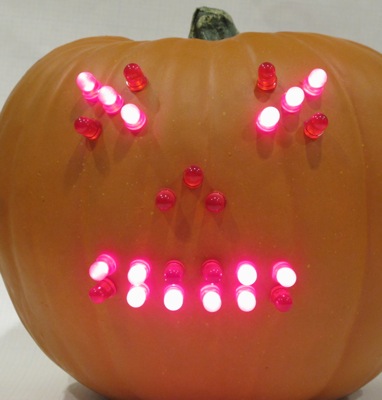
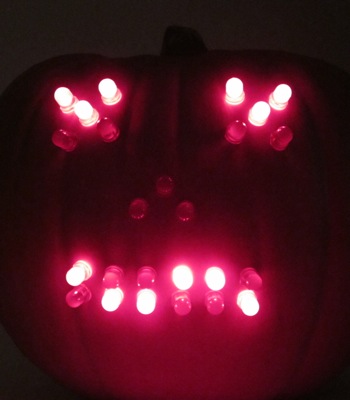
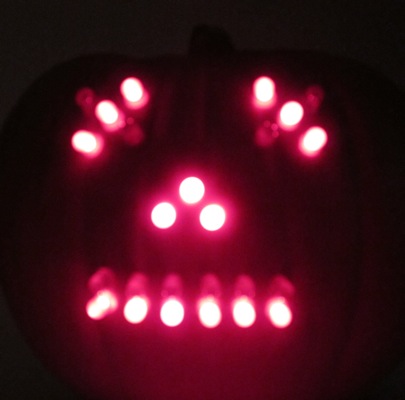
Originally I was going to try to layout the LEDs so I had triangles for the eyes and the nose. At some point it dawned on me that if I arranged five LEDs as the corners of a square and one in the center that I would have more flexibility for showing expressions. I applied this same logic to the mouth and put the leds in a long rectangle. Now I can have the pumpkin smile, frown, look angry, or confused.
LED Wiring
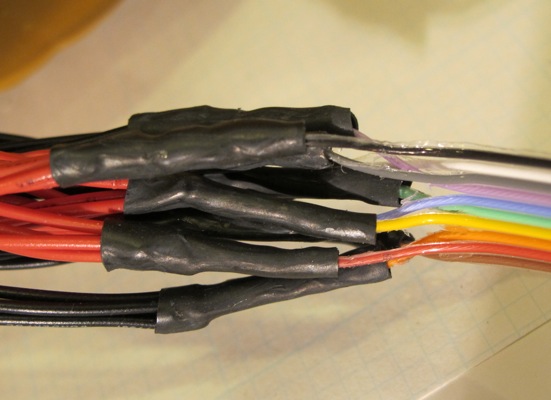
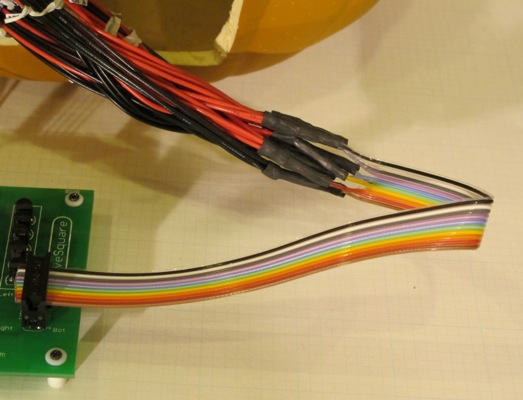
To connect the lights I started with a 10-conductor ribbon cable and 25 2-pin connectors that were already wired with red and black wires. I had to convert these ten lines from the ribbon cable and the fifty lines from the connectors into a matrix. So for each positive line on the ribbon cable, I soldered 5 red wires. From each group of LEDs that were soldered to one red line, I selected on black wire. This gave me five black wires, where the other end (the red wire) were each soldered to a different conductor on the ribbon cable. I soldered these five black wires to the first negative line on the ribbon cable. I repeated this process four more times.
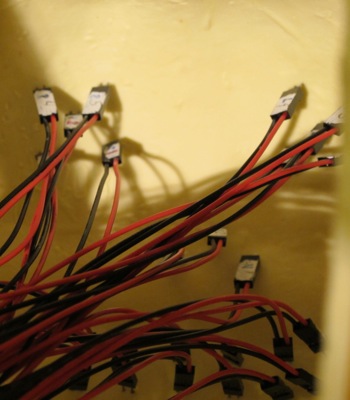
The next step was to identify each of the LEDs. It probably would have made sense to do this as I was creating the cable. Instead what I did was to insert an LED in each connector and connect the ribbon cable to the FiveSquare board. I created an animation that first lit up each row in order. I grouped the LEDs in each row together and marked the connectors with a row number. Then I changed the animation to light up each column. Now I could mark the column number also on each connector. With the row and column info, I could number each LED.
Once the connectors were identified, I started installing the LEDs. I did not want to cut holes in the pumpkin, since I thought it would make the pumpkin more like to break. Since the pumpkin was made of a stiff foam, I simply pushed the LEDs carefully through the foam. The hardest part was getting the connectors on each LED, since there really was not that much room.
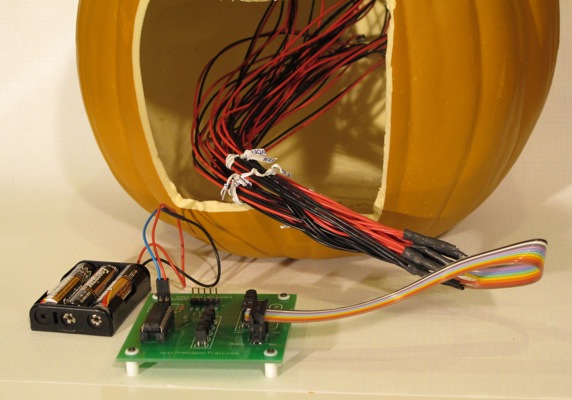
Once the LEDs were in and the cable was connected to the board, it was just a matter of attaching the battery. With this PIC chip, you can run either with a power supply or three 1.5v batteries. Using the animations I created with Animator, I reprogrammed the chip and was off and running.
Blog posts
Animated LED PumpkinElsewhere
Geeky-Gadgets.comTechna-bob
Neatorama
Geek americano..